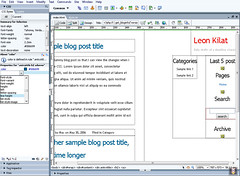
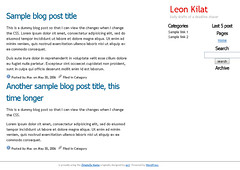
It has been more than a year since I used Dreamweaver to design a site. I’ve mostly been running sites using PHP-MySQL content management systems (CMS) and depend on the thousands of ready-made themes and templates to control the site design. For the occasional static page, I use Nvu for visual editing. But after reading this article on SitePoint, I wanted to try using Dreamweaver to edit one of the templates I’m using.
WordPress, like most PHP-MySQL CMS, uses template files to control the appearance of websites. The webpage is assembled from several PHP files controlling specific aspects of the site like the header, sidebar, main content and footer.
To use Dreamweaver to edit or customize WordPress themes, you need to combine these different PHP files into one page so that you can immediately view, while editing the codes, how the page would appear.
For this post, I edited a minimalist WordPress theme called Zimpleza.
The process
Go over the files of the WordPress theme you want to edit and study how it controls your blog’s appearance. Take note of how the pages, index.php (for the main page) and single.php (for individual blog posts), call the different template files.
The header is called first. What is called next depends on the WordPress theme you are using: some call the main content next then the sidebar then the footer. Other themes call the sidebar first then the main content and then the footer.
Create a new folder and copy into it 1.) the style.css of the WordPress theme you want to edit, and 2.) the folder containing the images.
Create a new HTML document in Dreamweaver and save it into the folder you’ve just created. Go to Code View and paste into it these lines:
The lines are code comments to guide you as you copy code from the different PHP files for editing and transfer these back again after you’ve finished customizing the design. Just re-arrange the lines if the WordPress theme you want to customize calls, for example, the sidebar before the main content. (click on photos to view larger images)
Copy codes
 Start copying codes from the different template files: the header.php, sidebar.php and footer.php. For the main content, copy the code that displays your blog content in index.php. The first thing you need to change is the location of the CSS file in the header. WordPress themes point to the CSS file using the line:
Just change to style.css so that your document can locate the stylesheet.
After that, change the dynamic calls for such things as your blog name and sub-title and add dummy headlines and article text.
Most WordPress themes that display the blog title as text have the following code:
What this does is display your blog name and link it to your main page. To view how the blog name is rendered, just delete and type in your blog name. Do the same thing for the blog tagline or subhead, which is displayed by the code .
Dummy content
In the main content, just delete the conditional statements found in index.php and retain only the code that displays the blog post.
Delete these lines:
Not Found


Leave a Reply